
In the first part we discussed about available types of Raspberry Pi. In this article we want to talk about program execution and boot principle.
We should get familiar with system before writing a code on hardware, follow SISOOG to obtain details of Raspberry Pi.
Inside the Core
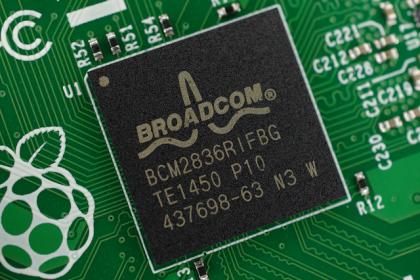
BCM2836
regarding single computer boards and embedded modules, manufactures try to make them simpler and smaller, all features are built into one single chip that contribute to tiny circuit. This trend is same for Raspberry Pi. Broadcom company has made a great contribution to the Raspberry project. All Raspberry products are based on this company’s chips which have two different processing cores. One Of them play the role as a GPU in video decoding and do the video and image processing. This ability makes Raspberry Pi capable for video player and home theater.
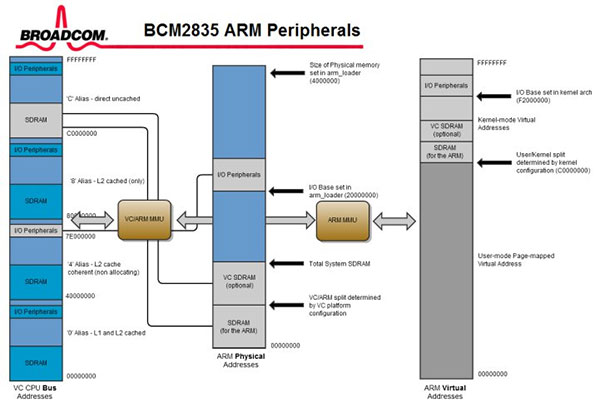
BCM2836 diagram
The second core is actually an ARM core which can be multicore, for instants Raspberry version 2 and later have 4 cores that process the programs. In these articles, we mostly work with this core and codes must be written in the way that this core be able to execute them. To save on resources, both cores are set up together to use one shared hardware equipment that contains shared interrupts. To prevent error and unexpected condition you should be careful about using resources and interrupts.
What happens when Raspberry Pi turns on?
The most important thing about running a program using a processor is to know about booting routine and power-up process which gives us the ability to run our code from the right memory address. Raspberry Pi has more complex system than microcontrollers due to more complex processor inner structure that is unavoidable.
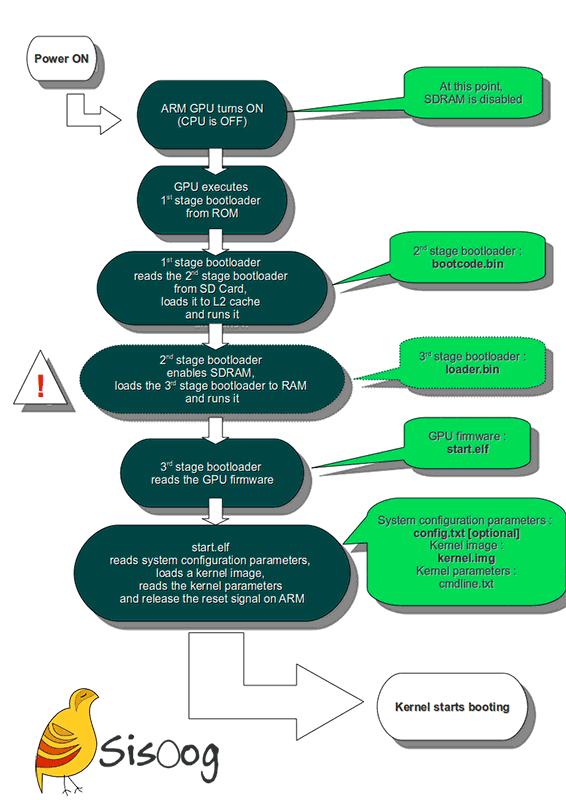
Raspberry Pi Boot diagram
After Raspberry Pi powers-up or restarts, at first, GPU searches the SD card for first partition of MBR (master boot record), then after detecting file partition of bootcode.bin, Raspberry Pi loads and run-on RAM memory. The bootcode.bin is like a bootloader which can be changed by the users. In normal operation after executing bootcode.bin, searches for start.elf and config.txt which presents hardware such as GPU settings for loading main kernel. Kernel.image loaded to memory address 0x8000 and program execution starts from this address. In fact, loading kernel is the last part of booting and user after this stage can controls a program.
How to start?
Before introducing compiler and learn how to compile and other settings, you can download a written sample blinking LED code from below links and place it in memory card. Be sure that choose Fat32 as file system type and BOOT as the name of drive.
format an SD card
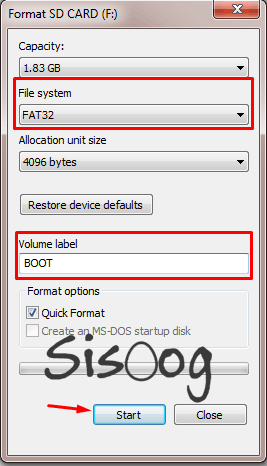
Formatting SD CARD
After that, download related files from this link, extract and past them in the memory card.

In this stage insert the SD card to raspberry pi, then ACT LED starts to blink.

In the next article we are going to discuss about configuration and installing required tools for compiling program and run the first program on Raspberry Pi board.