
In the last articles, we described installing required software for compiling and ran the first program in the third article. In this part you learn how to install Eclipse compiler as an editor. This editor not only makes coding easy but also makes it interesting. It is still possible to write program in notepad or other simple editors, but readability and speed of writing is important. As the program gets bigger and sophisticate, it is tough to memorize names of functions and variables.
Introducing the types of text editors
If you want to find a name you have to find input parameters which is super exhausting. Besides, the professional code editors by changing the color of different parts of code, facilitate readability and debugging.
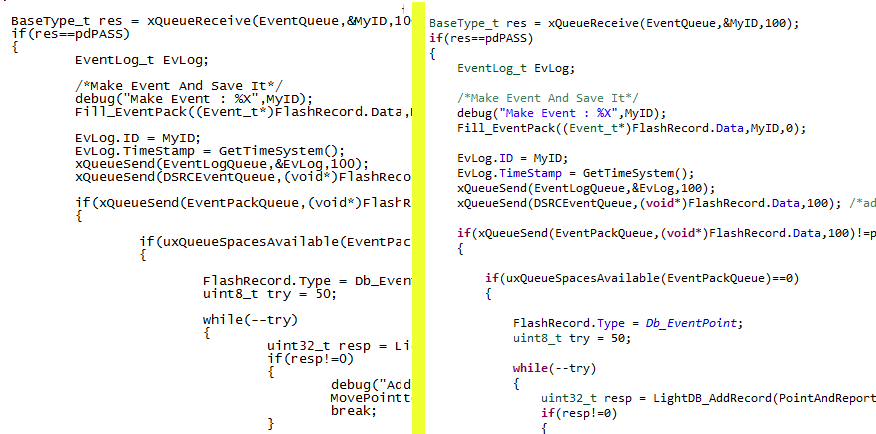
above image illustrates the difference between simple (left image) and professional (right image) editors. Some editors support more than one language. Usually for hardware and systematic programming, C and C++ are used. we need an editor which support these two languages. There is a lot of commercial editors with appropriate features, but due to SISOOG policy we only introduce and use free and open-source editors. The very epitome of which are these open-source editors:
1: NetBeans
There are numerous code editors which is hard to choose from among them so supportive features are so important. We choose Eclipse which is more popular as a Java editor, but it can support 44 programming languages as well as available for 4 operating systems: Linux, Windows, Mac and Solaris.
What editor do we recommend?
Eclips Editor
We use Eclipse editor for tutorial because of these features:
1: Open-Source
2: Capability to support many languages
3: Capability to install plug-in
4: Capability to run in different Oss
5: Suitable interface
6: etc.
How to install Eclipse?
Before installing Eclipse, you have to install Java (JRE). Depends on Eclipse version, proper Java version is needed. In this tutorial we use the last version of Eclipse named Oxygen, which needs Java 1.8 .
First Step
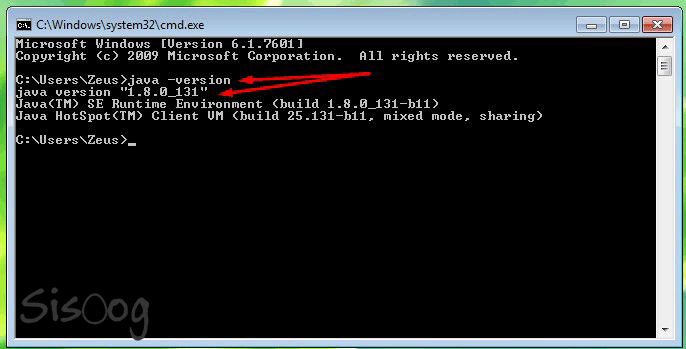
Before downloading and installing Java, you can check your OS, maybe, it is installed with other software. Type “java-version” in command line (terminal or command prompt) if java is installed, output must be like below.
|
1 |
java -version |
Pay attention that its version must be 1.8 .

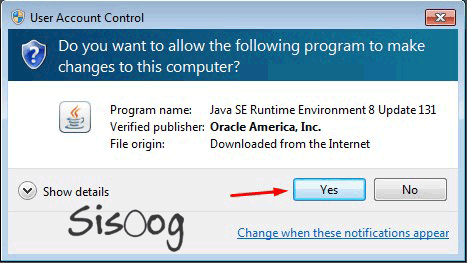
Otherwise, you can download Java 1.8 from this link and follow the steps below.

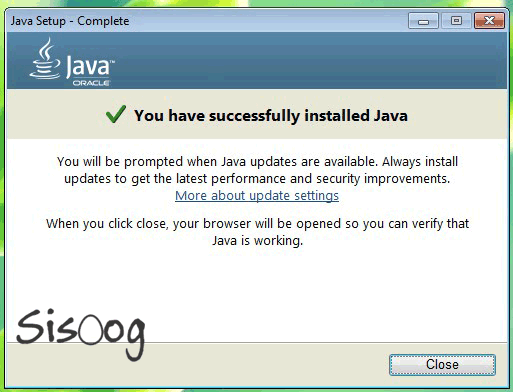
After installing finishes, be sure about correctness and version of Java.
Second Step
download and install Eclipse, it uses Java virtual machine so just download executable file and extract it. There is two ways for setting up Eclipse.
First, downloading Eclipse, then download and install its plugin (for C language use CDT plugin). This way method lets you using Eclipse by more than one programming languages.
The second way is easier, you can download and install special version of Eclipse that each popular language plugin has been installed on it. Here we used the second one. Go to eclipse website and click on C/C++ icon. Then extract the downloaded file.

Download Eclips
Third step
Install ARM development plugin, it needs to install another plugin named GNU ARM for running program for the ARM platform easily. This also adds some samples to project wizard, which makes building and configuring ARM project easy. Run the Eclipse and follow the steps below.

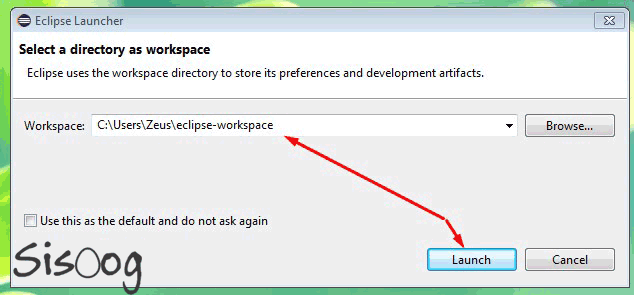
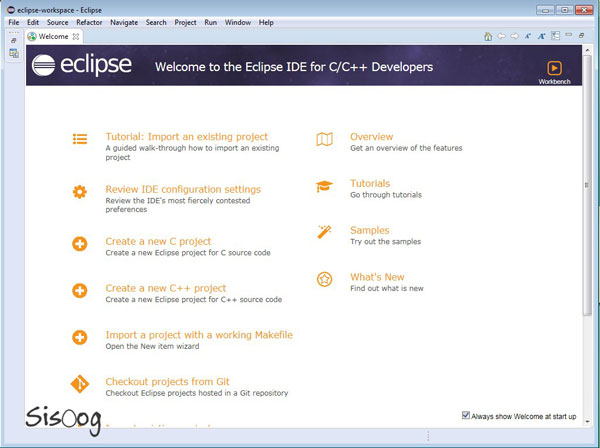
After running Eclipse successfully, you will see welcoming page that introduces Eclipse and gives some guidance for using it.
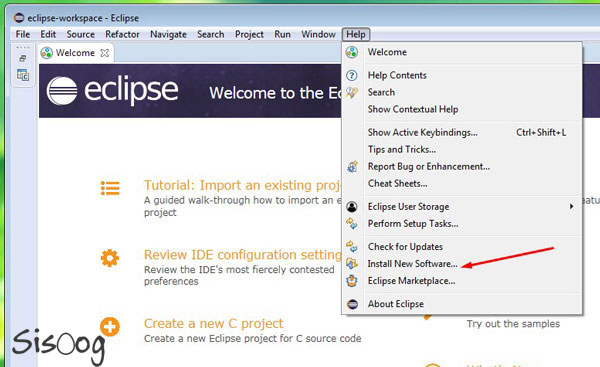
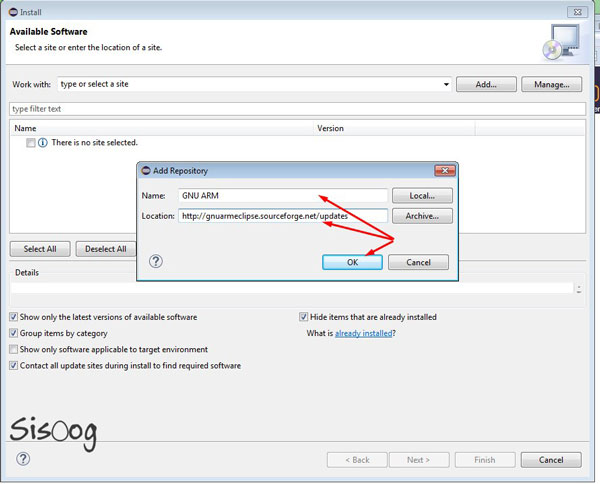
For installing plugin, select “Install New Software” from “Help” menu in opened page then click Add button.
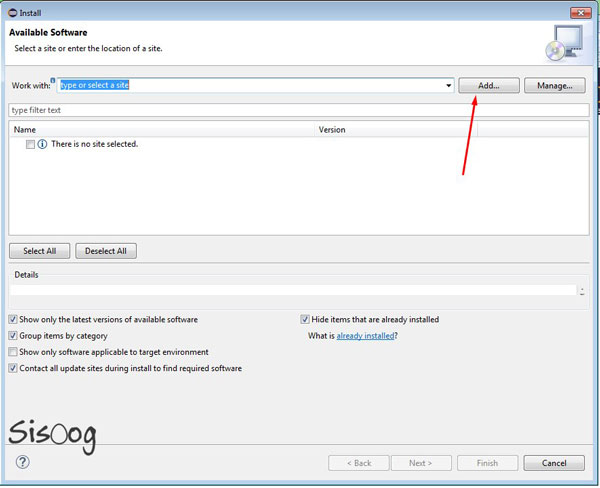
In “Name” field, enter GNU ARM and in “Location” Field enter the following value. Then, click OK button. Eclipse loads plugins information. Please wait until loading complete.
|
1 |
http://gnuarmeclipse.sourceforge.net/updates |
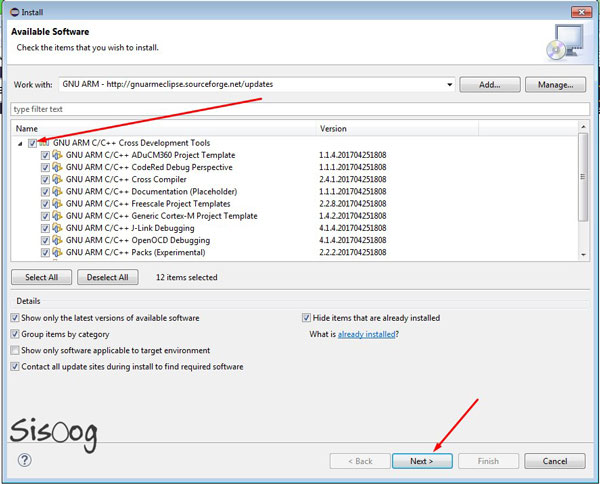
After loading plugins information, related information is shown like picture above. Select required packages and click Next.
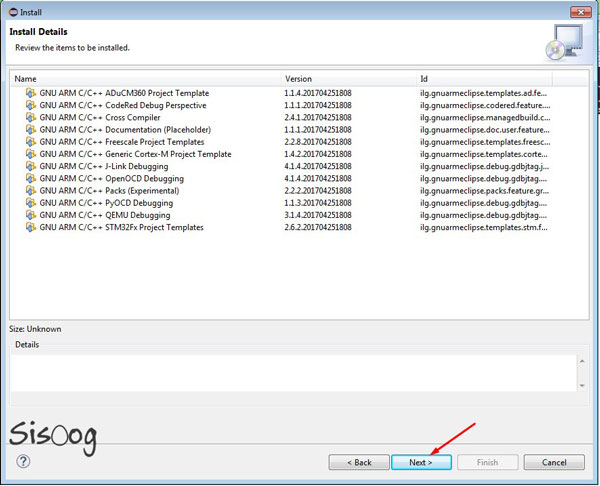
Here, selected packages are shown. Click Next if everything is correct or click Back to edit them.
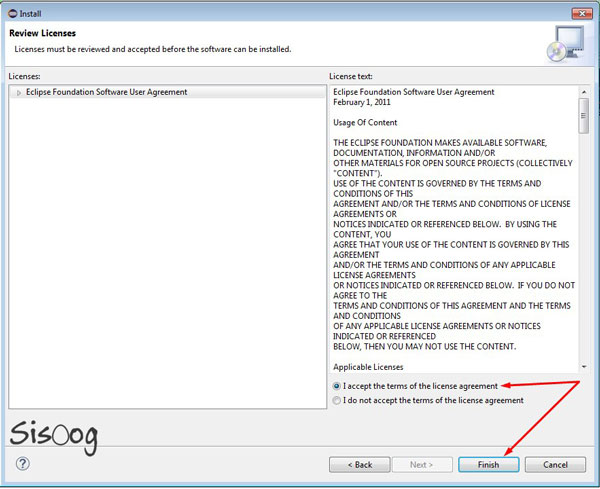
Here, you have to accept the terms of the license agreement and click Next.
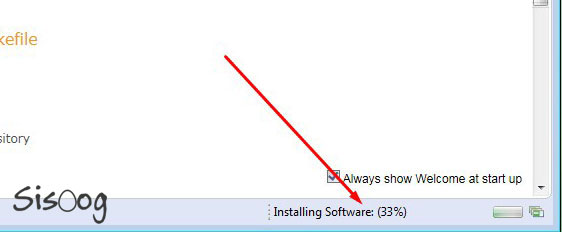
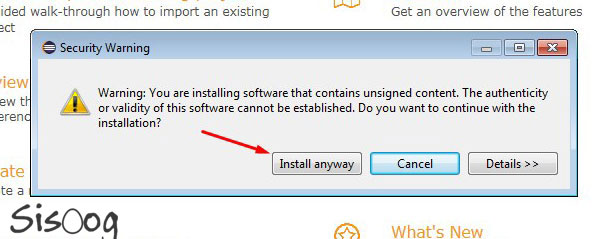
Please wait until the installing and downloading required sections finish. Note that you should confirm every downloaded part likes below.
After installing plugins, Eclipse shows a message to restart, accept it.

Install Windows tools
We need free GNU tools for writing and compiling codes in Windows. For this purpose, we should install necessary tools through the below link. Please download the latest version.
|
1 |
https://github.com/gnu-mcu-eclipse/windows-build-tools/releases |
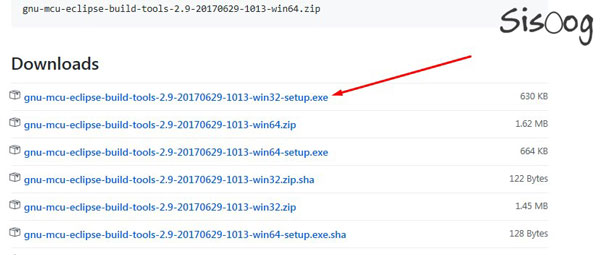
For installing, just click Next button like others. Just memorized the installation path because it must be added to system’s path.
Default destination path is defined as the picture below.
|
1 |
C:\Program Files (x86)\GNU MCU Eclipse\Build Tools\2.9-20170607-0922 |

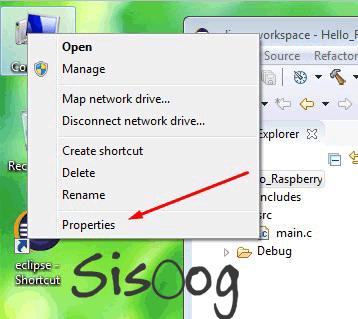
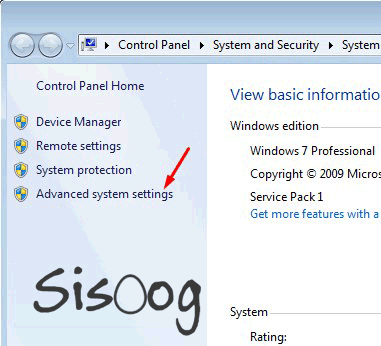
As we said before you should add destination address to the system’s path. Right-click on my computer and select properties.
Then click Advanced system settings as below.
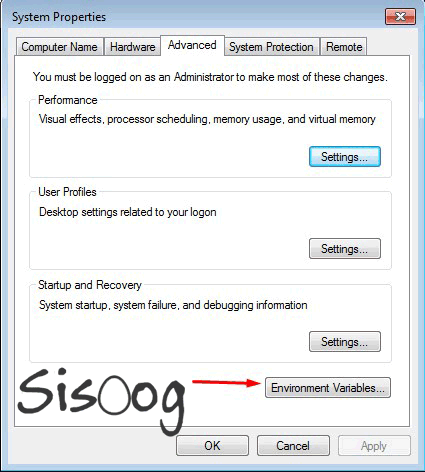
Then click Environment Variables.
Select PATH from “User variables for Zeus” and click Edit button.
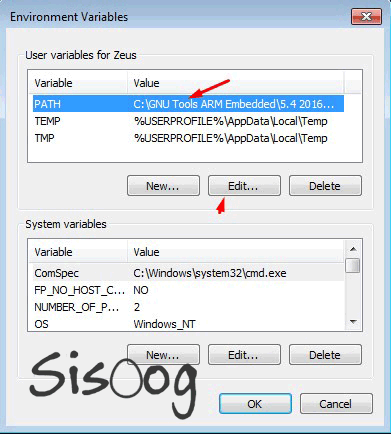
Note: Zeus is my computer admin name, this name of your computer admin is put here.
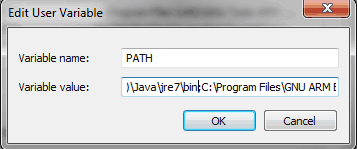
In opened window, at Variable Value, add a “;” at end of the line, then add address of make.exe file. This file is usually in bin folder in installation location as below.
|
1 |
C:\Program Files (x86)\GNU MCU Eclipse\Build Tools\2.9-20170607-0922\bin |
At the end, close all opened windows by clicking OK button. To make sure about path, run command prompt and type this command.
|
1 |
make --version |
The output must be as below
|
1 2 3 4 5 6 7 |
GNU Make 3.81 Copyright (C) 2006 Free Software Foundation, Inc. This is free software; see the source for copying conditions. There is NO warranty; not even for MERCHANTABILITY or FITNESS FOR A PARTICULAR PURPOSE. This program built for i386-pc-mingw32 |
It means installation and configuration of needed tools have been done correctly.
first Raspberry Pi-2 project using Eclipse editor
Now create the first Raspberry Pi-2 project using Eclipse editor. We blinking LED project which was taught at the second tutorial. Here is the code:
|
1 2 3 4 5 6 7 8 9 10 11 12 13 14 15 16 17 18 19 20 21 22 23 24 25 26 27 28 29 30 31 32 33 34 35 36 37 38 39 40 41 42 43 44 45 46 47 48 49 50 51 52 53 54 55 56 57 |
/* ============================================================================ Name : main.c Author : Zeus Version : Copyright : Your copyright notice Description : Hello World in C ============================================================================ */ /* The base address of the GPIO peripheral (ARM Physical Address) */ #define GPIO_BASE 0x3F200000UL #define GPIO_GPFSEL4 4 #define GPIO_GPSET1 8 #define GPIO_GPCLR1 11 #define LED_GPFSEL GPIO_GPFSEL4 #define LED_GPFBIT 21 #define LED_GPSET GPIO_GPSET1 #define LED_GPCLR GPIO_GPCLR1 #define LED_GPIO_BIT 15 /** GPIO Register set */ volatile unsigned int* gpio; /** Simple loop variable */ volatile unsigned int tim; /** Main function - we'll never return from here */ int main(void) __attribute__((naked)); int main(void) { /* Assign the address of the GPIO peripheral (Using ARM Physical Address) */ gpio = (unsigned int*)GPIO_BASE; /* Write 1 to the GPIO16 init nibble in the Function Select 1 GPIO peripheral register to enable GPIO16 as an output */ gpio[LED_GPFSEL] |= (1 << LED_GPFBIT); /* Never exit as there is no OS to exit to! */ while(1) { for(tim = 0; tim < 50000; tim++) ; /* Set the LED GPIO pin low ( Turn OK LED on for original Pi)*/ gpio[LED_GPCLR] = (1 << LED_GPIO_BIT); for(tim = 0; tim < 50000; tim++) ; /* Set the LED GPIO pin high ( Turn OK LED off for original Pi)*/ gpio[LED_GPSET] = (1 << LED_GPIO_BIT); } } |
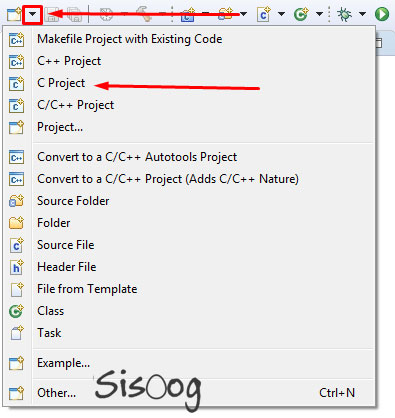
First of all, select C project to build one, as below:
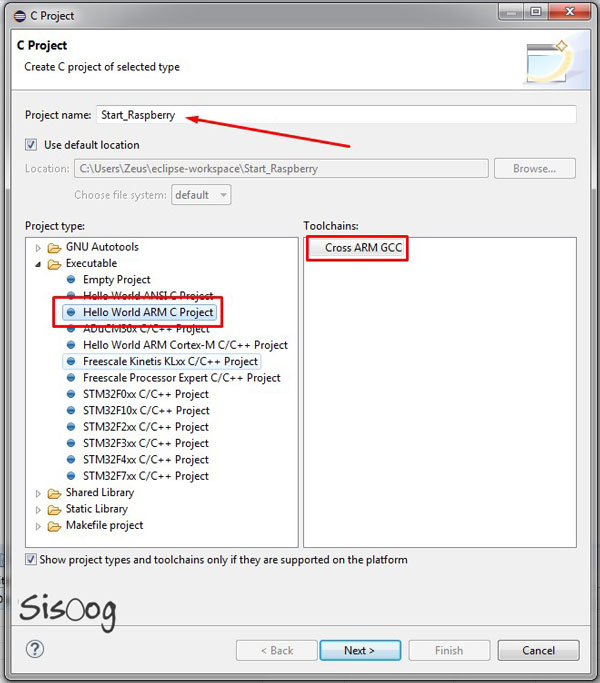
Choose a name for your project. Just be careful, it should not contain space character. You can use underline character “_” for separating words. For instant, type “Start_Raspberry” instead of typing “Start Raspberry”. Depends on your installed plugin, there may be more choices for Project Type. As an example, there is some prepared projects for STM32, but we want to create a project for Cortex-A7, so we choose Hello Word ARM C project. Choose Cross ARM GCC from Toolchains. This part may has other options due to different installed compiler. Then click Next button.
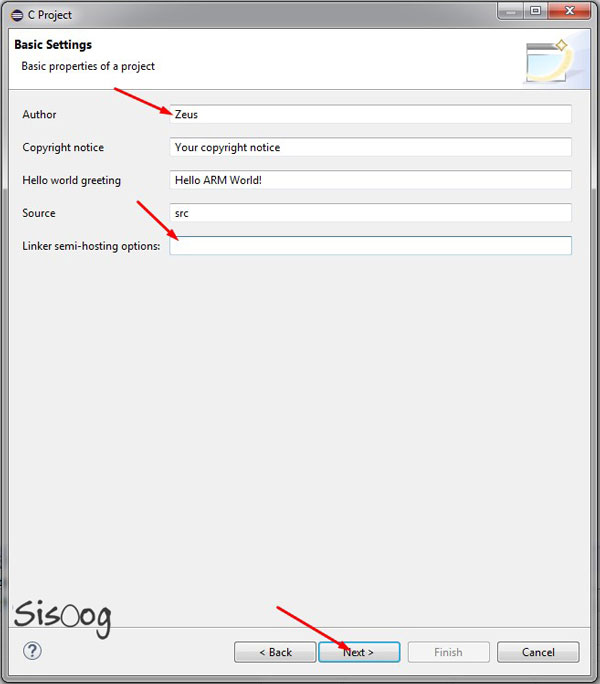
In the next step, you can insert your name as Author or creator. this name is default for future project. Remember to delete all Linker semi-hosting options. This item is not needed for this project. After this, click Next button.
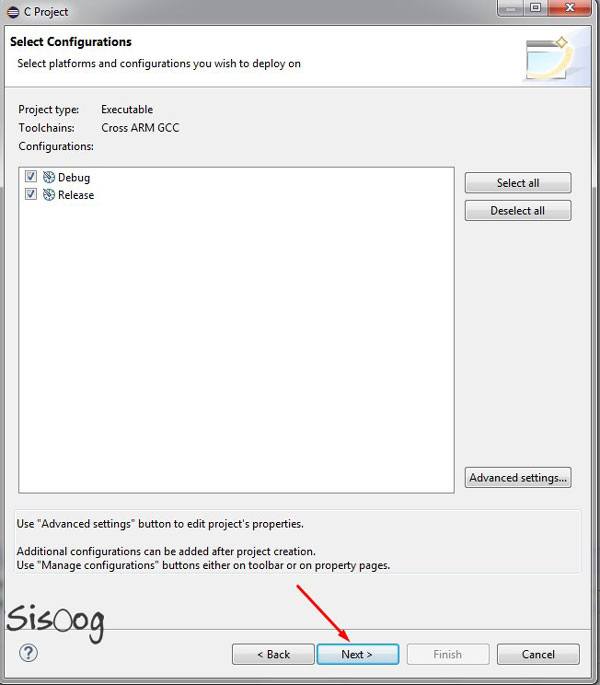
We have nothing to do with this step for now.
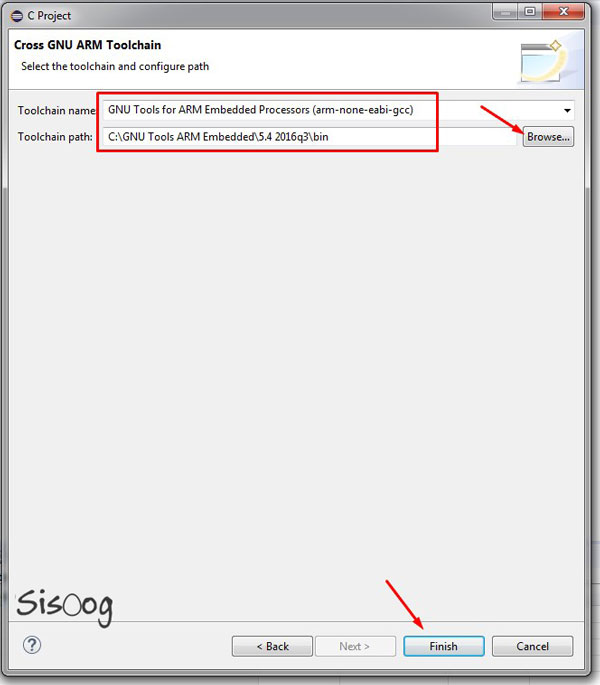
Click next, this is an important step which we can choose compiler installation address. Given that Eclipse compiler supports wide range of languages, we have to use ARM compiler. If you do not have Raspberry-Pi compiler you can go to the third party of Raspberry-Pi tutorial. Type the first section as the below picture. In the second section you should insert “arm-none-eabi-gcc.exe” file path. To do this click Browse button and choose the folder. By clicking Finish button, first project is created.
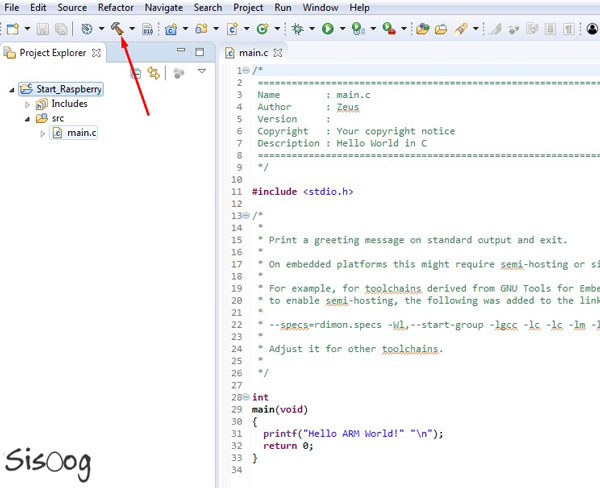
Then you will face an environment as below. You can see the project files at the right side of the picture that you can modify each of them by clicking.
For compiling codes click on hammer icon or use Ctrl+ B hot keys.
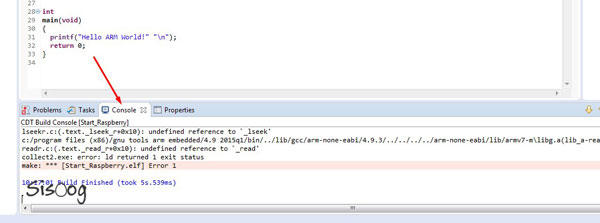
When you press the hammer button, it is completely predictable that the compiler shows error and does not compile the code. At the bottom of the compiler debug log shows some errors. Replace your program with created default program then you have to adjust the settings to execute proper output to run on Raspberry-Pi.
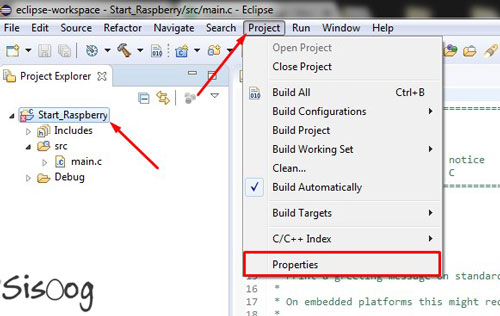
To adjust settings, select the project icon, then select properties from project menu.
In opened window, select C/C++ Build from left menu and click settings to open compiling adjustment.
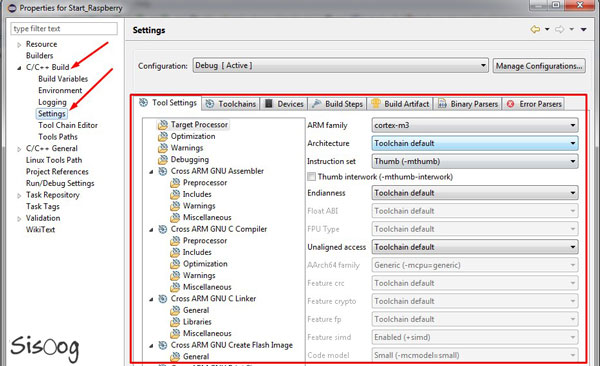
In “Target Processor” we can configure processor type, its architecture and extra options like FPU, so executed code will compatible with hardware. Adjust Raspberry-Pi 2 setting as shown below.

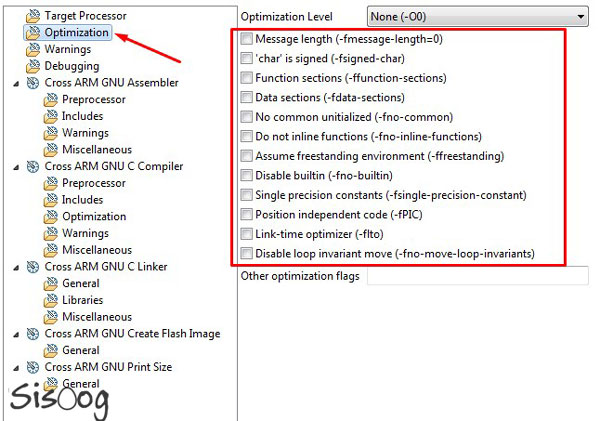
To optimize your code, you can use optimization section, but in this project, we do not need it right now so disable it.
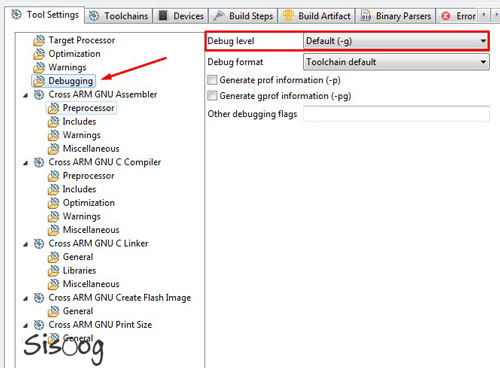
Next step is debugging. We set it as default because we do not want to debug it.
Next setting is about Linker, setting should be set like the picture below.

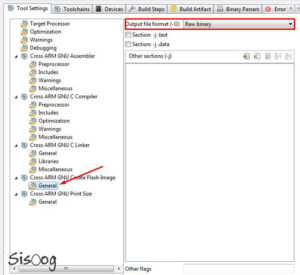
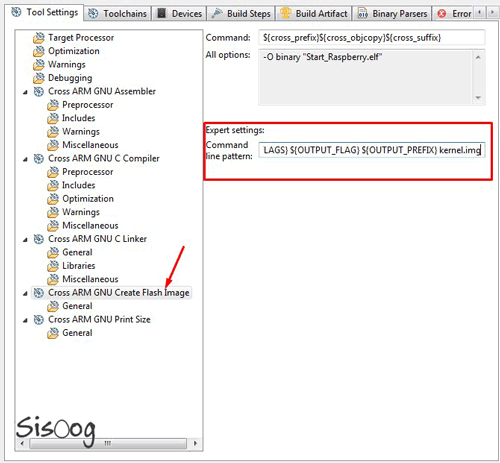
Now you should define output format for compiler. It must be binary because program placed in RAM by bootloader.
At the end you should define final output format for compiler. From previous parts of articles, it must be kernel.img, so bootloader is able to boot it. Put following command in “Command line pattern” like the picture below.
|
1 |
${COMMAND} ${FLAGS} ${OUTPUT_FLAG} ${OUTPUT_PREFIX} kernel.img |
After these settings, all you have to do is compiling the project.

If you get something like the picture above, we congratulate you for your first success in Raspberry-Pi programing.
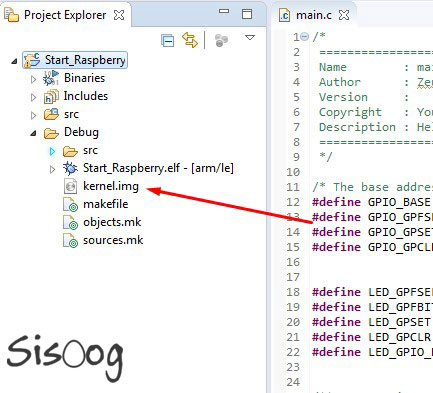
To gain output file, select kernel.img from Debug folder which is created inside of the project and use Ctrl+ C to copy the output.
Conclusion
we finished the first series of Raspberry-Pi articles. Our aim is to teach you the basic of booting methods and hardware. Beside them we prepared vital tools for compiling and creating codes. In the second series, you learned how to set up different parts of hardware like GPIO, UART, creating start up files and using IRQ. Dear followers, we are delight to share your experience by sharing some pictures of your hardware and software with your name on SISOOG Instagram.